Settings - StreamMyiTunes Tab
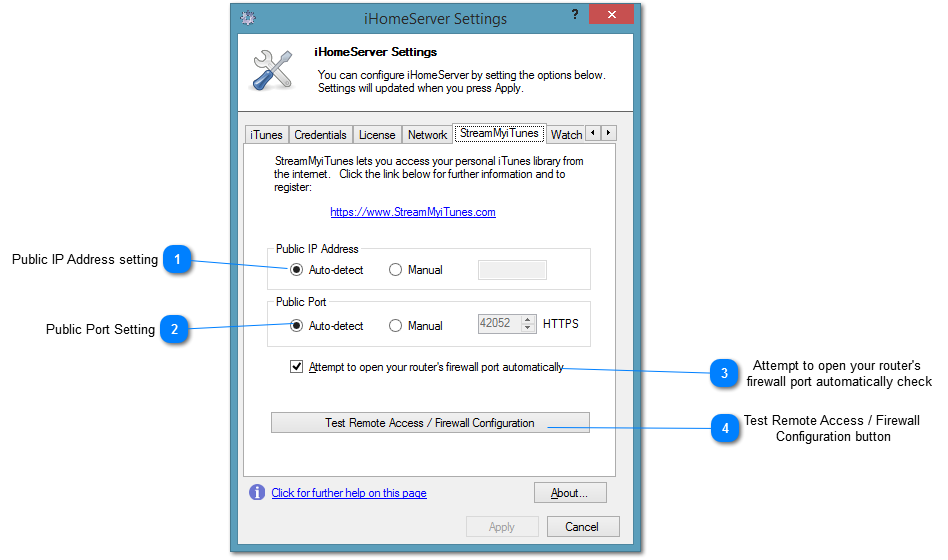
The StreamMyiTunes Tab within iHomeServer settings allows you to configure the Internet facing IP address and port that will be advertised to Stream My iTunes. Only advanced users should need to change these settings.
The tab also allows you to test your iHomeServer Web Access remote access / firewall configuration.
 Public IP Address setting
Stream My iTunes needs to know your public / Internet IP address in order to maintain its Dynamic DNS entries for your home computer. This allows you to find your iHomeServer on the internet even if your IP address changes. To do this, your iHomeServer instance will periodically send an update message back to the Stream My iTunes web servers. In 'Auto-Detect' mode, the Stream My iTunes web servers will look at the originating IP address and assume this is the external IP address hosting your iHomeServer instance.
You can override this behavior and provide a static IP address directly to Stream My iTunes. If you want to do this, click 'Manual' and type your public IP address into the field provided.
|
|
 Public Port Setting
Stream My iTunes needs to know the TCP port you have opened on your router that maps to the iHomeServer Web Access HTTPS listener that services the iHomeServer Web Access interface up securely. In 'Auto-detect' mode iHomeServer assumes that you have configured your router to port forward the same port number that iHomeServer's HTTPS listener uses. If you select 'Manual' you can override this if you want to port map at your edge router/firewall. For example, if you want to run the HTTPS listener on iHomeServer on port 42052 but want to expose the service to the Internet on port 8443 then configure the HTTPS listener ( on the Network tab) to 42052 and define the Manual Public Port as port 8443 in this tab. Finally, set up the port mapping on your router to map port 8443 to port 42052 on the internal IP address you are running iHomeServer on.
|
|
 Attempt to open your router's firewall port automatically check
If your router supports UPNP, then iHomeServer will attempt to communicate with your router automatically and set up the required port mapping. If you do not want this behavior then untick this checkbox.
|
|
 Test Remote Access / Firewall Configuration button
|
|